Showing posts with label multiple disabilities. Show all posts

Saturday, April 12, 2014

Making an Object Book

Another Friday has come and gone, there are 26 student contact days left minus 3 personal days equals 23 for me to personally deliver lessons! That doesn't sound so bad does it?

Join us at Doodle Bugs Teaching for the party!


Object books were introduced to our team by our vision specialist. Our student is nonverbal, has limited movement and vision. The specialist created a book about bath time to share with our student, it also is a great model for us in learning how to make more object books. She also pointed us in the direction of an excellent resource: Nevada Dual Sensory Impairment Project.

Another goal for our student has been to have him more involved in lessons with other children. We decided to make pudding together.

Materials 
poster board
hole punch
binder
instant chocolate pudding box
paper bowl
milk carton (school lunch size)
wooden spoon or small whisk
plastic spoon
hot glue, tape, something that will make objects stick to pages


1. Cut the poster board into pages. Punch holes to fit into a binder.

2. Type up simple instructions for making the pudding.

3. Take out the pudding mix out of the box, flatten the box and glue to the first page.

4. Trim down the paper bowl and glue the bottom of it to the next page.

5. Cut the milk carton in half (I trimmed the back half) and used double sided tape to stick it to the page.

6. Tape a spoon or whisk to the next page.

7. I found an image of a child enjoying  a bowl of pudding and glued it to the last page along with a plastic spoon.


Corresponding activity:

Read the book with the students before making the pudding. Repeat the book one page at a time as they make the pudding. 


More about object books

Lots more can be done within an object book. The bath book had small zip lock bags containing items such as a small bar of soap and shampoo which the student can smell.  


We are already thinking about our next book! Hope this gives you some ideas.

Paula


Monday, February 24, 2014

The Special Educator's Toolkit- Classroom traffic flow and Setting up Boundaries

I am loving this resource for teachers! The Special Educator's Toolkit by Cindy Golden is a wonderful guide to organize your chaos. I feel that I am an organized person, but it takes me FOREVER to actually get it in place. The process that is described in this book really helps to get it together much quicker.

This is the third post regarding this toolkit and I am still in the first half of the book. Previous posts:
Introduction
The Classroom Environment

This is a continuation of the chapter addressing organizing your classroom environment. Traffic flow creates a pathway to follow around the room. When you consider your flow, your student's physical, educational and emotional needs must be considered. Retail Stores use it very effectively. We do the same thing in our classrooms using visual boundaries.


"Classroom flow strengthens the structure of the room's environment".
Cindy Golden

 It helps students to know where and what each part of the classroom is for.  Traffic flow for students with disabilities should be arranged in a manner that makes sense to them. Many students with developmental delays have difficulty reading nonverbal social cues, they need visuals that help structure the unwritten rules of the environment and provide cues to know what is expected from them.

Visual boundaries are created in a classroom by positioning available furniture and shelving.,Students benefit from knowing what the function of the space is, where it begins and ends and the expectations within the space.
The author provides some different ways to create visual boundaries in a classroom. 


Some of the ways we have created boundaries in our classroom:


shelf and a rolling cart


Cardboard! easy to move around, this is a temporary barrier


My husband made these several years ago, he has modified them a couple of times, they are invaluable!


Two file cabinets, back to back.

the other side of the cardboard wall


Classroom Zones and Purposeful Spaces
Each area in your classroom should have a purpose and contain visuals to provide structure for the students. It will make  it easier to find materials. You can go a step further and color code the different areas! The author promises to discuss that later in the book.

 No matter what shape or size your room is, it can function as a classroom when planned and organized to make the most of the space.


"Every classroom will be different and sometimes certain areas may serve double or triple duty. You also need to build on the room's strengths."
Cindy Golden


Suggested areas to consider:

  • Individual academic areas
  • group area
  • coat/ backpack storage area
  • data keeping area
  • centers or work stations
  • leisure area
  • transition/waiting area
  • cool down area
  • staff work area

There is more information and suggestions for each area.


I have been doing this for awhile. I start with a blank piece of paper, draw a basic map of my room minus the furniture, (sketch in the items that are permanent-like the promethean board) I make a list of the areas I want to set up and I make a list of my available furniture. I almost always have to make an area (or 2) have a dual purpose.

Looking at the author's suggestions and applying them to my situation...


  • I don't have a waiting area, I would like one.
  • My cool down area is also the leisure area which is ALSO the library, is that a good idea? (I think NOT)
  • I like my individual stations
  • The teacher/staff area works
  • ahem....I don't have a data keeping area

This is where we will leave off. Next time, I will share and ponder...creating a waiting area, maybe change my cool down area, organizing the walls, schedule areas, step six, and color coding! 

Paula


Friday, September 27, 2013

Five for Friday.....September 27, 2013

It is time for linking with Doodle Bugs!


1. I've been refining our listening center. It is on our workshop rotation twice a week. It has been a process to teach students how to use the machines and follow the directions. One day we have an audio book, the other day is the card reader. I added a booklet this week to fill in the blanks with a high frequency target word. One of the students need the words "pre-written" with a highlighter, one needs a starter word, then he can continue on his own, and another doesn't need any help!  I also added more specific directions and introduced them before we started workshop. It helped a lot!


2. Next, I displayed the basic directions on the Promethean Board for a group project. The visuals were more effective then me talking!


3. Tumblebooks.com  is awesome! The kids love it and with our amazing Promethean Board, everyone can see just fine. Our school has a subscription to the website.


4. This week I dug out my trusty stamps and scented ink pad. I was once again wowed by the fact that the ink pad is still working! This ink pad and turtle stamps were a gift from my sweet sister almost 20 years ago! I received it in Oklahoma, packed it when we moved to Tok, Alaska, again to Wrangell, Alaska and finally now in the great Mat-Su Valley. Out of curiosity, I looked up Ranger Industries of Tinton Falls, NJ and they're still in business. I didn't see this exact ink for sale but I'm going to write them.


5. Finally I want to share a picture of my youngest daughter and her sweet kitten. She could make a cat food commercial!


There's my week in a nutshell!
Have a great weekend and tell me about yourself,
Paula

Saturday, May 18, 2013

More task ideas...simple and fast

This is a continuation of the Creating Tasks segment.  There are a few more I wanted to share that are easy to put together. It also illustrates how presentation  makes such a difference to our kids!

This is the very first one I put together. Materials: oatmeal can, string, beads, duct tape.
First, punch a small hole in the bottom of the can, just big enough to thread the string through. Tie a knot so the string cannot come back out. Use a piece of duct tape to make the string as flat as you can. Second, cut a hole in the lid large enough for a stringed bead to go through. Third, cover the outside of the can with construction paper, laminating it first is even better. Velcro the beads to the outside of the can.


Skills: fine motor, hand/eye coordination, color identification, counting.


Another simple and fast task is setting up a puzzle:

These rectangle shape boxes with a short lip are invaluable! I am always digging these guys out of the trash.... box lids, water flats, ramen noodle boxes, there is no end to their uses! (sometimes at Wal-Mart I load one of these up with cans of vegies or whatever I'm buying) I orignally had a small box  on the left of the puzzle, to place the pieces in.  This format seems to work better because all the pieces can be seen.

I found this magnetic Sesame Street board at a thrift store for a dollar, it was all alone...I got my handy dandy box of magnet letters out and dug out close matches. I like to spread out the letters so we avoid frustration if it is taking too long. A fun variation is to hide the letters in a sensory table or box full of rice. As they find letters, ask them to tell you the name and/or sound it makes and match it on the magnetic board. Kids of all skill levels have fun with this one.
Mr. Potato Head! They love him but are not sure what to do with him. Providing  visual step by step directions is very helpful. They quickly learn how to put him together without them. 


Monday, April 8, 2013

Play skills

This is a basic "put in" task that is very useful. It is great for students who are learning how to play and it is motivating for students who are reluctant to go to the table or desk. Once you have introduced this task, all that is needed is to hand a car to the student and he/she will go straight to the box and put it in. It will take a bit of shuffling, but he/she will sit at the table/desk and continue the task! I made a new one because the previous was used so much, it wore out and we threw it away finally.

  The materials:
box, recycled from snack box
green, blue, yellow and gray duct tape
clear tape
clear tube, recycled from plastic Easter eggs
Velcro, I buy the roll so I can customize the size
Box cutter knife
small cars


The secret to getting the tube to fit correctly: cut the hole for it a tiny bit smaller, so the tube fits tight. I also trimmed the end that is inside the box a little so the cars would roll into the box easily, this box had it's own garage door, so removal of cars is easy.


I used some good ole' duct tape to anchor the tube to the box on the inside. Since the box and tube you use will be recycled from different sources, you will have to experiment to make your activity fit just right. The beauty of duct tape is that you can remove it and adjust. Duct tape is awesome!


Cut velcro into little pieces, a good way to place the item with the velcro is to attach to item first, stick the adjoining piece of velcro to the item and then place onto box. Do a test run on the first car to make sure the velcro doesn't interfere with the car rolling.


Here it is in all its glory! Ready for many hours of fun.


Another fun activity pictured here is to drop frogs down the tube, watch and listen to the "plop!"as they splash into the water! When gathering your materials, the most important feature to look for is a clear container.


I used this activity with a student who had limited language skills, and loved songs. We would sing the "Five little speckled frogs song" while he played with this. Fun and laughter! Priceless..

There are many variations to these tasks, experiment and have fun with your students.

Paula


Tuesday, January 22, 2013

Creating Tasks


Creating tasks, they are referred to as task boxes most of the time because we use a lot of boxes to put them together. However, in truth, lots of other types of containers are used, including simple folders.

The rules for creating an effective task:
1. Have a clear beginning
2. a clear path to follow
3. and a clear ending.
4. Begin at the left and go to the right, just like we read words.

That’s it! Remember that a picture is worth a thousand words? So for this article I am going to show pictures of some of my favorite tasks and include a brief description for each. Not all students who benefit from this type of structure are low functioning, many can read and are working near their grade level! They need to learn new skills and be motivated to keep moving forward.


This task can be adjusted depending on students skill level: counting one type of coin or a mixed set. Writing the amount or using number cards to identify the amount. The velcro strip along the top is for the number cards. 
Matching objects to a photo

fine motor skills, the tweezers light up as an additional motivation!


Reading simple sentences...matching to the real object.....the finished product goes in the last box.


This task has been modified several times, it started with a real picture, then a line drawing, words were added and then the drawing is phased out, leaving only the words to match.

There are some awesome books with task ideas, once you start making them, you will get your own ideas, it will be based on:

  • your students' skill level 
  • current curriculum 
  • materials you have available
Basic materials: duct tape (gray and colors), velcro, boxes, envelopes, folders. I have a box full of various items that are waiting to be in the perfect task. These are the pieces of games, puzzles, old programs, that you no longer use, but hate to throw away. Task building is recycling!


Conclusion
Remember that if a task doesn't work, don't give up, modify....adapt....sit down at a desk and be the student, does it make sense?  When you present it to your student, you almost always spot the flaw immediately!

I have many more tasks I would like to show here, but for now I think I will finish this. Please contact me, ask questions, make suggestions!


Monday, January 21, 2013

Using Visuals


It is absolutely true that a picture is worth a thousand words, especially when it comes to teaching children with communication delays.  Using visuals with children diagnosed with Autism Spectrum Disorder has been well documented, but they are also very helpful for all children.  It really is better to point to a picture, rather then talk, talk and talk some more.

Temple Grandin, a well known adult with ASD (Autism Spectrum Disorder) has shared that she “thinks in pictures” and using visuals has helped her to become a successful independent person. She recommended that teachers and parents adjust the environment and their teaching strategies to this type of communication. Teachers can use visual supports to assist students who have difficulty with social interactions, behavioral challenges, organization, transition and communication.

When I first began to use visuals with my class, I would display a medium size visual with a word or phrase in the order of activities that we were going to do. I had a daily schedule and another for group activities. I didn’t use it for every step of the day, I wasn’t sure HOW to.
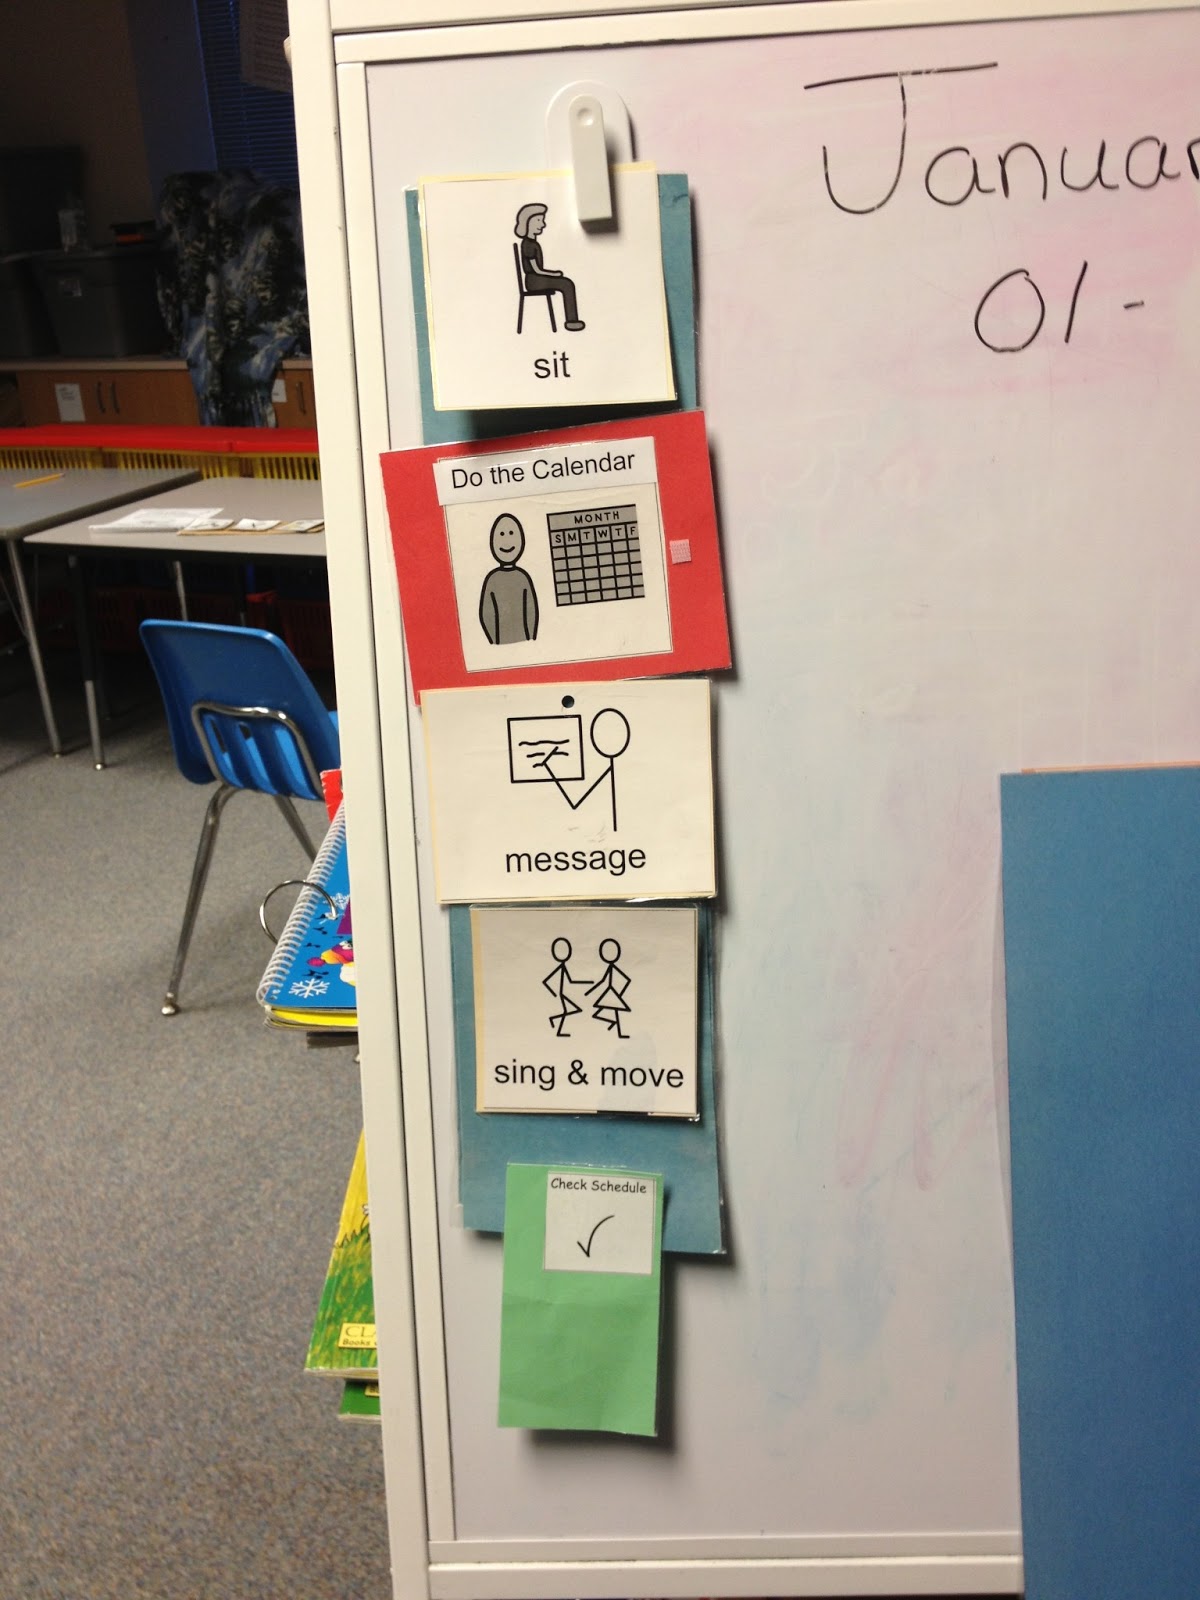
A schedule for Circle time

When we began to expand the use of visuals, each student had his or her own schedule, the type of visuals varied, based on each student’s skill level:
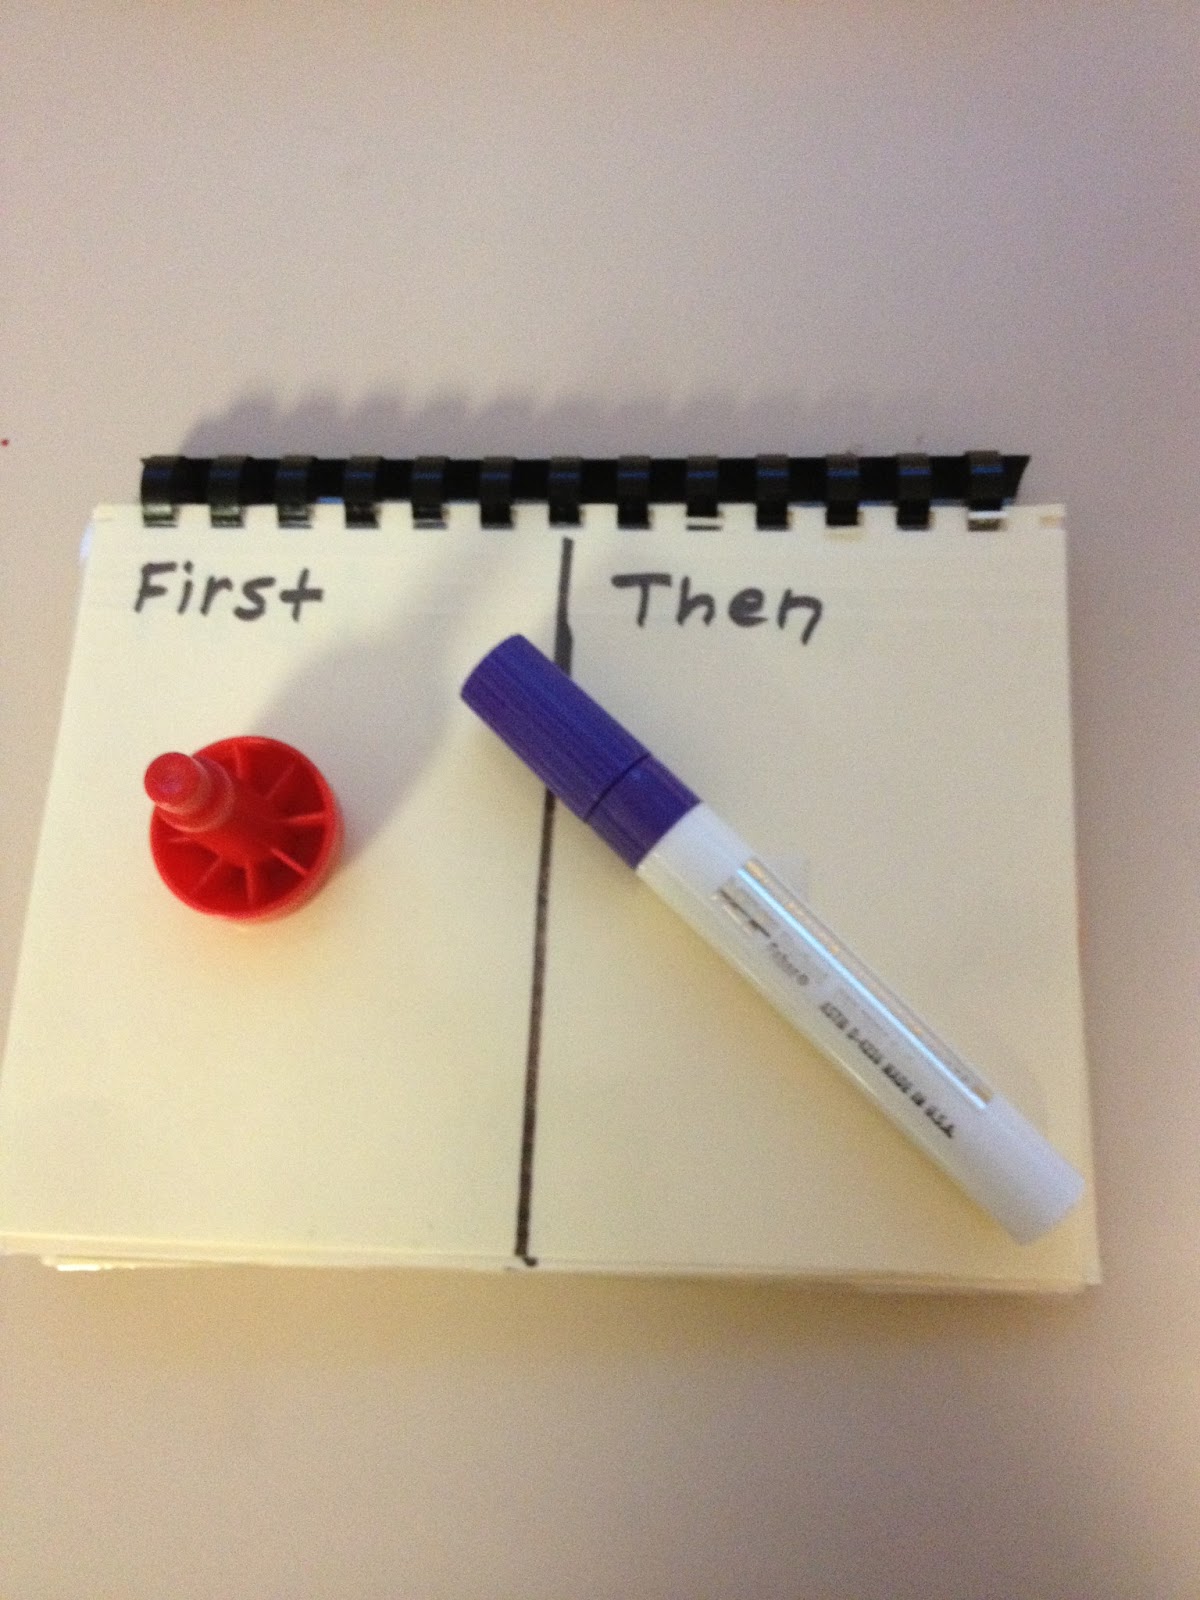
Object first/then schedule
a) objects: tangible objects that represent an activity. For example, a puzzle piece or peg to transition to the fine motor table or a marker to attend the art table.


b) photos or drawings: There are some handy software programs to assist with picture schedules. Taking digital photos is also a good option. Taking a picture of the place they need to go to is very helpful.
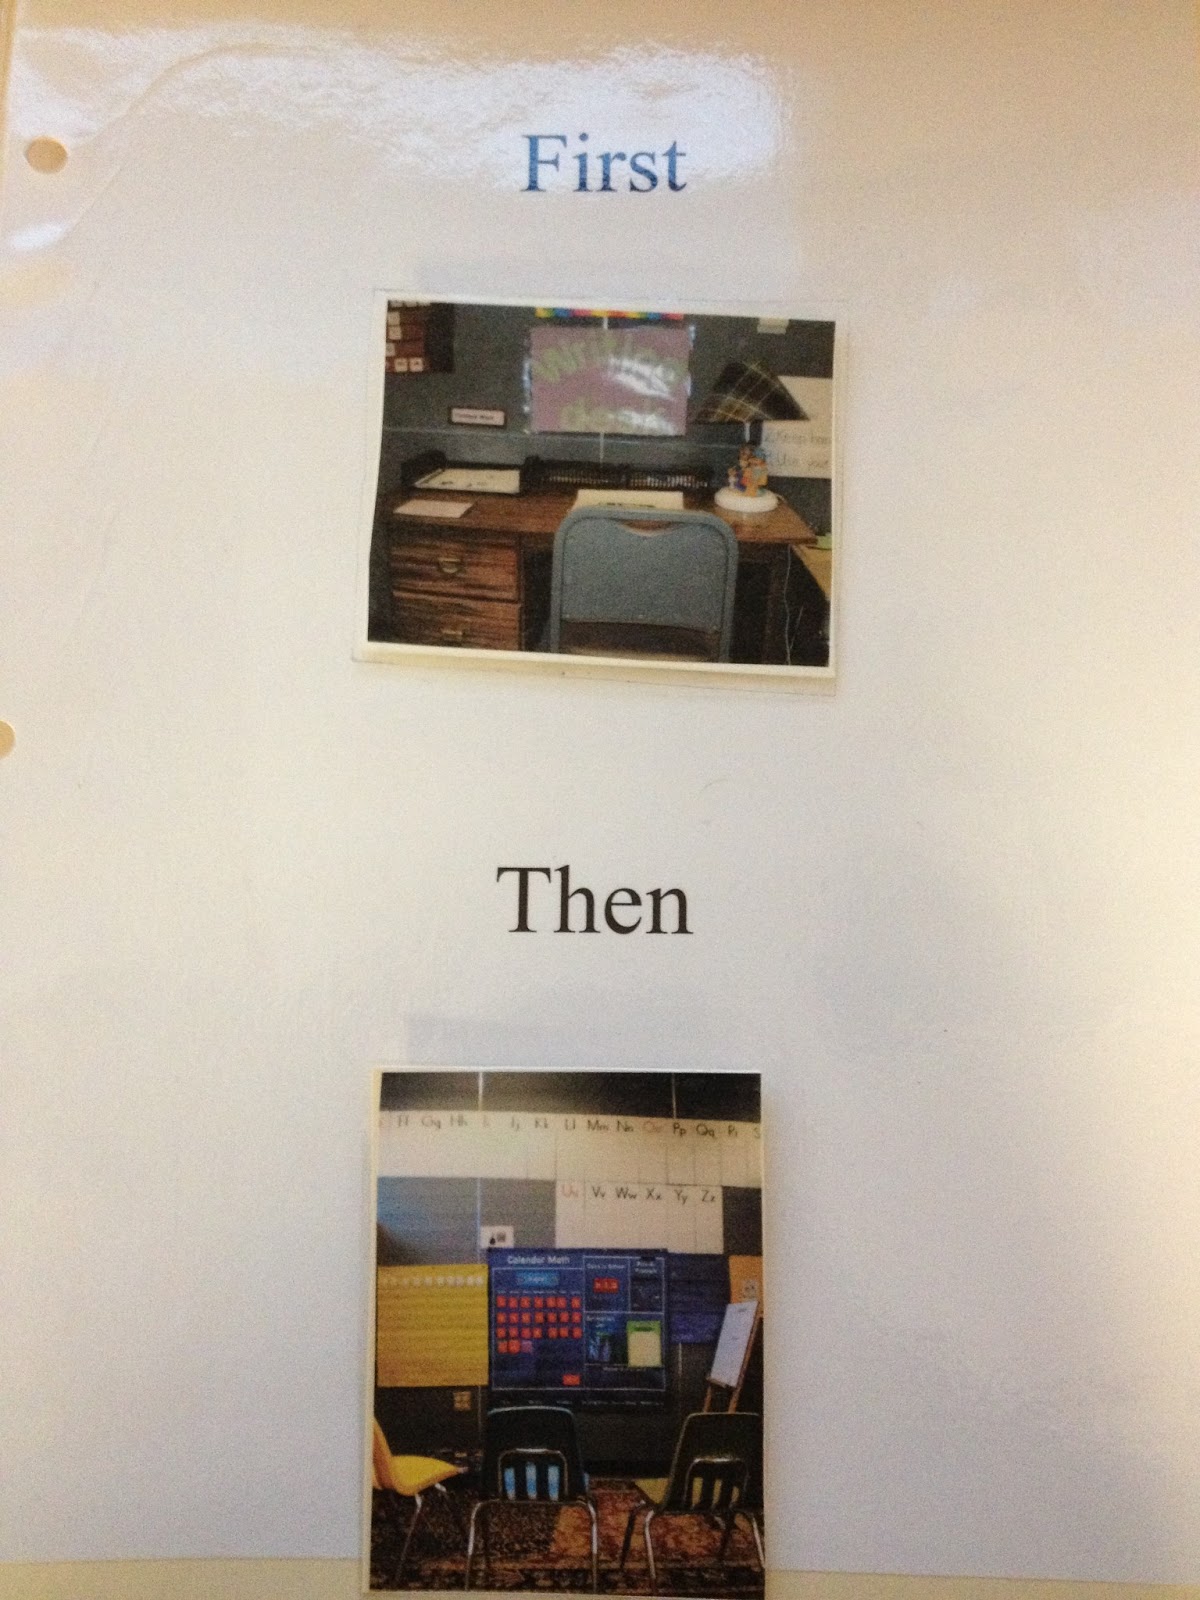
Digital photos

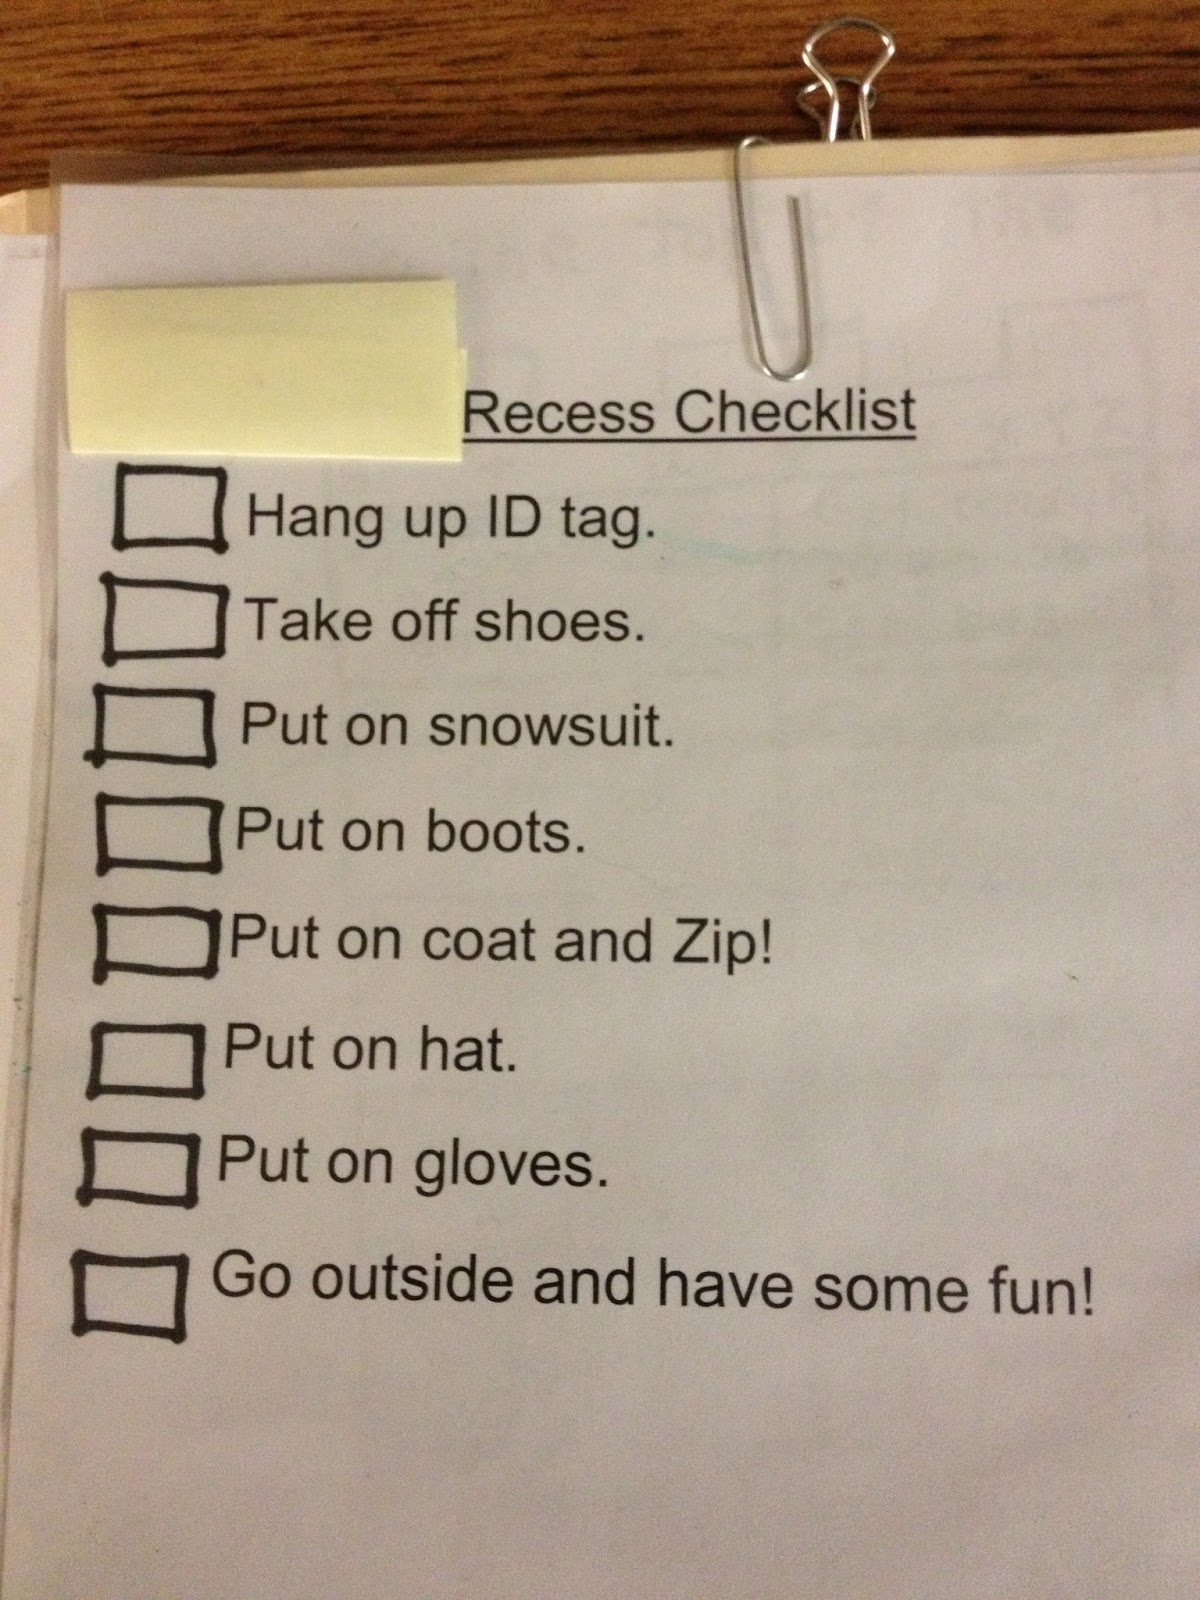
A checklist for the reader


c) words/phrases/sentences: Introducing words/phrases with a picture is many times the best way to ease into using words only.  Students who can read are successful  using a clipboard with their schedule attached, they can read and cross off each item as they complete it. A plastic sleeve is useful in putting the schedule in and erasing at the end of the day.
Depending on the student’s ability, the idea is to move them up through these type of schedules, the less cumbersome the schedule, the more mobile it is, and the more successful the schedule is in the long term.

Here’s the process: 

1. Hand student a “check your schedule” cue.  The cue can be a card or an object such as a domino.
2. Student goes to their schedule, located at their home desk or perhaps located in a central area that is for transitions.
3. Student looks at their schedule, if they have a removable item, they take it with them, the item/picture card leads them to their destination. They may place the item in something at the destination, an envelope or a box or even a puzzle or peg board where their piece finishes it.
4. At their destination, the next picture schedule tells what is happening while they are there, what is expected and when it ends. It is reassuring to them to know it will end!

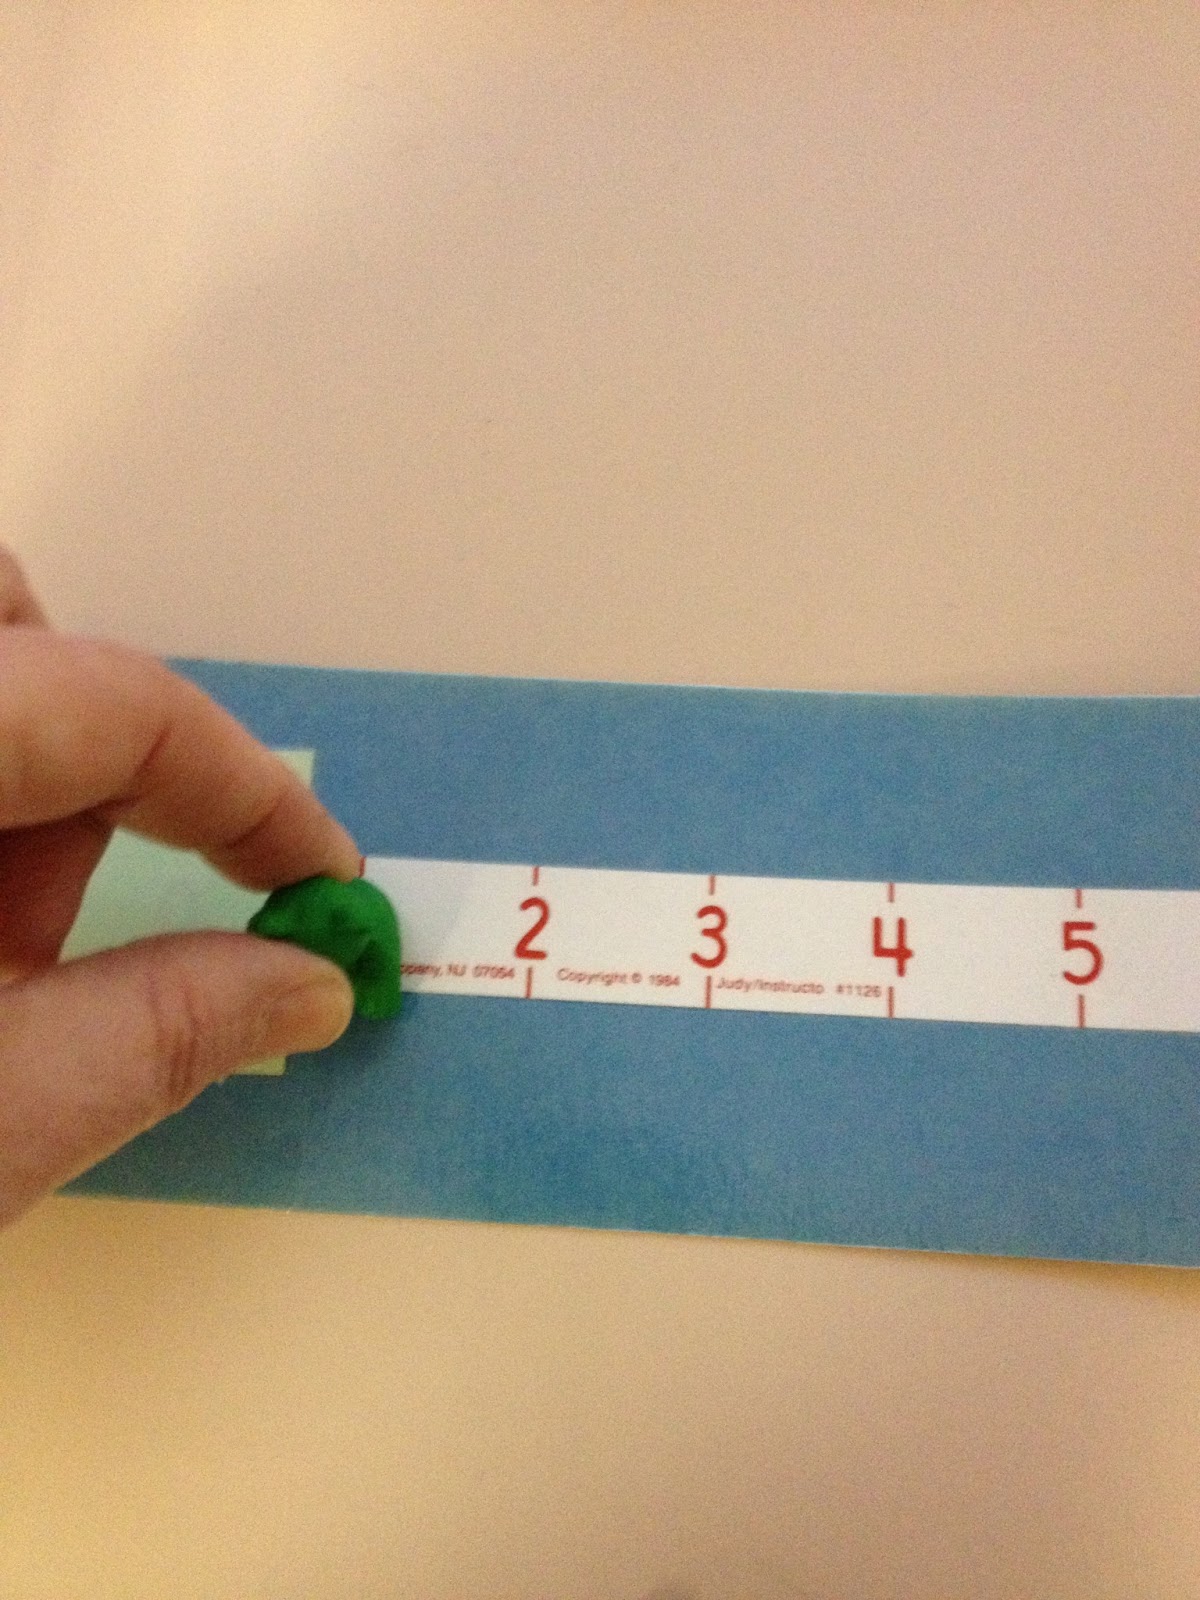

The power of pictures became very evident to me when I was attempting to work with an Autistic student. He was resistant to sitting with me to do the lesson. I put a picture of the  work table on his schedule and he willingly walked to and sat at the table.  The lesson was one to one correspondence counting to 10. I had a number line 1-10 and 10 counting bears. I modeled first, placing a bear on the number 1 and saying “1” and so on. Nothing. I tried a little hand over hand. Bad idea! He screamed and got under the table. I got out my digital camera, took pictures of myself placing a bear on the number line, I went up to 5, hoping he would continue after getting to that point. I printed them out in black and white (color ink is expensive and we usually have to buy it!), glued it on a strip of construction paper.
I went back to the work table, yes, he was still sitting under there! I got on the floor and showed him the picture strip, I had starred the first picture of the sequence. Here is the miracle! He took the strip from me, got up, sat in the chair, and completed the activity! He smiled big at me! It seemed he was saying “Finally! You are making sense!” I nearly cried. After that, he happily worked with me whenever it was on his schedule, our “work schedule” got less detailed, but he still would try everything I presented to him.


Schedules and instructions aren’t the only uses for visuals in a classroom.  They can be amazing in behavior management, show a student a strip with 1-5 on it while he is engaged in a fun activity, tell him (or sing it) “5 more minutes to play”, he removes the 5; adult moves away; return in a short time (we don’t really time the minute) and say/sing “4 more minutes to play”; repeat until student removes the last number and gently begin the clean up song. Depending on your student’s needs, a picture of the “clean up” might be under the 1. The key is for the student to move the numbers, they acknowledge they know a transition is coming up. We sang it because our student loved music and singing, we could get him to look and focus with music.


Organizing all these visuals is overwhelming! You have spent a lot of time printing out these cards for specific activities and will use them over and over, but you need to be able to find them when needed again! I am still working on the perfect organizational system for them, I have 3 drawers full of bags of cards and strips with Velcro. When I pack for summer school, I try to figure out how to travel with them and make them useful. One idea I have used for the last couple of years is a large 3 ring binder system. Cut  file folders in half, label the tabs, apply rows of Velcro so your cards will stick, then you can flip through quickly and find the picture you need.


Resources

Fettig, A. Meadan, H., Michna, A., Ostrosky, M., Triplett, B. July/August 2011, “Using Visual Supports with Young Children with Autism Spectrum Disorder”, Teaching Exceptional Children.

TEACCH (Treatment and Education of Autistic and Related Communication-handicapped Children) Classroom Training, 2009.

http://www.do2learn.com

Pictures were made from Mayer-Johnson's Boardmaker and/or Writing with Symbols 2000 programs.