Showing posts with label organizing classrooms. Show all posts

Saturday, March 29, 2014

Five for Friday...March 28, 2014.....The Special Educator's Toolkit.....making changes!

Join us in linking up with Doodle Bugs !

Thanks to the assistance of Cindy Golden's The Special Educator's Toolkit, I have been restructuring my classroom. My most recent changes:


ONE
Transition/Waiting Area
Our classroom has visuals to mark where to line up when they prepare to leave the classroom. However, if everyone is not ready at the same time (and let's be real, there are always doddlers), the standing in line thing does not last very long! So I created a waiting area with the expectations posted.


TWO


Cool Down Area
Sometimes students have trouble controlling their behavior. There is a need for a place to cool down in. It should be free of distractions with minimal visual clutter. Items to include in this area may be: Cool down steps, social stories, a timer, a choice of sensory items to help the student become independent in becoming calm. the area should also be easily seen by staff.


THREE


Organizing the Walls and Teaching Boards

Dr. Golden recommends cutting back on the visual clutter and making the walls useful. Each area should have visual clues as to the area's function.  The OMAC system renames the decorative bulletin boards as teaching boards. She suggests devoting the wall area to the subject: reading, math, social skills and so on using basic visual supports that is helpful to the students. Another idea is to make the walls interactive.

This wall has been for decoration all year, cute, but not serving any purpose. The class was ready for words, so creating a word wall in this big space seemed logical. In just two weeks it has been useful for learning high frequency words and a spelling resource when we are writing.


FOUR

"In terms of "purposeful decor", consider traffic signs to help arrange your classroom. Students with autism spectrum disorders do not generalize skills well, so this is a tremendous opportunity to use signs such as Stop, Yield, Danger, Phone, Bathroom, Enter, and Exit. Because these are typical symbols found in the real world, these signs help students reintegrate into society."

Cindy Golden
The Special Educator's Toolkit


One of my students pointed out that the girl and boy are on the wrong side! This is our bathroom checkout poster, I will probably end up fixing it.


FIVE

Spent a fun day with our grand daughter this week! 

I went into the plastic maze at Carl's Jr. with her first......


Then passed the torch to her Aunt! She got to do more exploring with her! 

and that's my week,
Talk later,
Paula


See previous posts inspired by The Special Educator's Toolkit:

January 7, 2014: The Introduction
February 15, 2014: The Classroom Environment
February 24, 2014: Classroom Traffic Flow and Setting up Boundaries

Saturday, February 15, 2014

The Special Educator's Toolkit- the Classroom Environment

This is the second article about implementing the OMAC (Organization and Management of a Classroom) system outlined in the book, The Special Educator's Toolkit, by Cindy Golden. The first one, the Introduction, can be seen here.


We will begin to review and apply the next chapter- Organization of the Classroom Environment.


STEP ONE: Really LOOK at your classroom. Ms. Golden provides a handy form, "How's My Classroom?" List what's working and what's not working.

 STEP TWO: Next is the Clutter cleaning.  The author suggested: Throw Away, Share with others, and definitely keep.  


STEP THREE: Inventory your materials. The author provides a list of suggested materials. Most of the materials are supplied by school districts. There are some items that would be out of your pocket.


STEP FOUR: Questions to answer....
What will you do with the space?
What kinds of activities will be happening in the space?
Are there specific limitations?
Are there specific needs of people using the space?
What is the overall goal?

In the first chapters of the book, a form that assists you in determining each student's individual needs is provided. This is helpful when you are starting from scratch with a new student.
This form simply has columns labeled, who, what, where, when and how.
Your students' needs, educationally, as well as physically can be sorted out on this form and it will help in answering these questions.

STEP FIVE: At this point, Cindy directs you to look at what information has been gathered, it is a starting point to making a layout for the classroom. It is not completed yet, she shows us a couple of sample layouts. I love layouts, they can provide a new idea on setting up a room. In my case, my classroom is already set up, but there are areas I don't like.  


Before moving on through The Special Educator's Toolkit, let's try this system out on one of my "not working" spots.


This shelf has been our "catch all" place all year. When I wasn't sure where to put something and  didn't want to lose track of it, this was the spot! As the year progressed the use of that area changed, so the materials that were needed on a daily basis got stuffed into the shelf too. 


Everything was removed from the shelf and laid on a table. I sorted into piles for throw away, keep in the shelf,and put away. I had sorted and shared a lot of items at the beginning of the year, but I never miss a chance to give away one more thing.

Out of necessity,  the same containers are used,and each one was uncluttered, they were holding lots of unnecessary junk, especially that clear box on the top shelf!

This shelf is in the area where small groups of students meet with a teacher for instruction in math and reading. At the time of the pictures, there were two different groups, now there are three (groups) meeting here! This is a great use of this area, I'm loving that our classroom can be used by other teachers. I want this shelf to be a neat, clean storage place for the materials required for each group, and because the groups are taught by different teachers,  it  should  be labeled.


In retrospect, I should have taken pictures of the inside of each container because that is where the real changes happened! The clipboards are another suggestion from the author, they have the daily lesson plans and the student's objectives with space to mark  progress.

This makes it easier for teacher assistants to know what students' expectations are and help to keep data.


There's more to do here of course! The bottom shelf needs more work...........

Until next time,

Paula


Tuesday, January 7, 2014

A Toolkit for Special Education Teachers-Introduction


Introduction
I am reading The Special Educator's Toolkit by Cindy Golden. It was on my wishlist forever and one day, I impulsively ordered it. I was so excited to receive it, but then...it just sat next to my chair, I would browse through it and notice something interesting, but lay it down again. Initially, I thought that I would pick one section and apply it, but as I browsed the realization came that the whole system should be utilized to be truly effective.  So I decided to start writing about it on my blog. I know myself and I won't ever get around to it if I don't make it an assignment.  My goal is to summarize some of the high points and give my interpretation of the information.
Ultimately,  I  will report on my progress in applying  the OMAC system in my special education classroom/program and how it turns out.


 Research Basis for the OMAC system

OMAC is the acronym for the Organization and Management of a Classroom system. The author explains that it is nothing new, but a compilation of all the research based techniques and interventions organized  into one book for teachers. When I read this line, I was relieved! Today's world has so much information that it is overwhelming, I end up giving up and not wanting to think about it anymore!
The author shares information about Autism and some best practices when working with students with this diagnosis. She does an overview of ABA and the teaching methods associated with it.  I hadn't really made the connection that some very familiar systems are ABA based!  
The OMAC system is for students with all types of disabilities. This system is a summary of the best practice in the field of special education and organized in such a way to be easily implemented in all types of educational settings by experienced teachers, as well as new ones.

 Getting started

Who can implement this system? Anyone! This book is for veterans, mid-career folks and rookies. It can provide a start and it can give you fresh ideas.

What is the OMAC system?  It is made up of six layers, the author says think of it as a recipe, the end product is to create a model program or classroom that is organized and easier to manage that is based on research based best practice.

Where can it be implemented? Anywhere!

When should you start it? Anytime and with all grade levels. The author recommends that a layer be completed before going to the next. 

Why do this? Reduce stress for yourself, improve parent and staff communication, increase student achievement in behavior and academics.

How? The author provides some forms to assist in looking at your current structure and getting a handle on what you and your students need.

Okay! Now I am going to work on those forms, take a good hard look at my classroom organization before beginning! 

Paula


Friday, July 19, 2013

Setting up my classroom...Day 1 and 2

I am having so much fun setting up my classroom for the coming school year! I picked a color theme and with the help of teacher blogs, Teacher pay Teachers and Pinterest, there are plenty of cool ideas!
The beginning...........


 I am starting on my classroom early because I will be visiting Oklahoma the last couple of weeks before our return to school. Since our keys are checked in at the end of the year, the only time to get in the building is when our hard working custodians are there. Of course, summer school cuts into this grand plan! It leaves me 2 days to get in.

new borders!

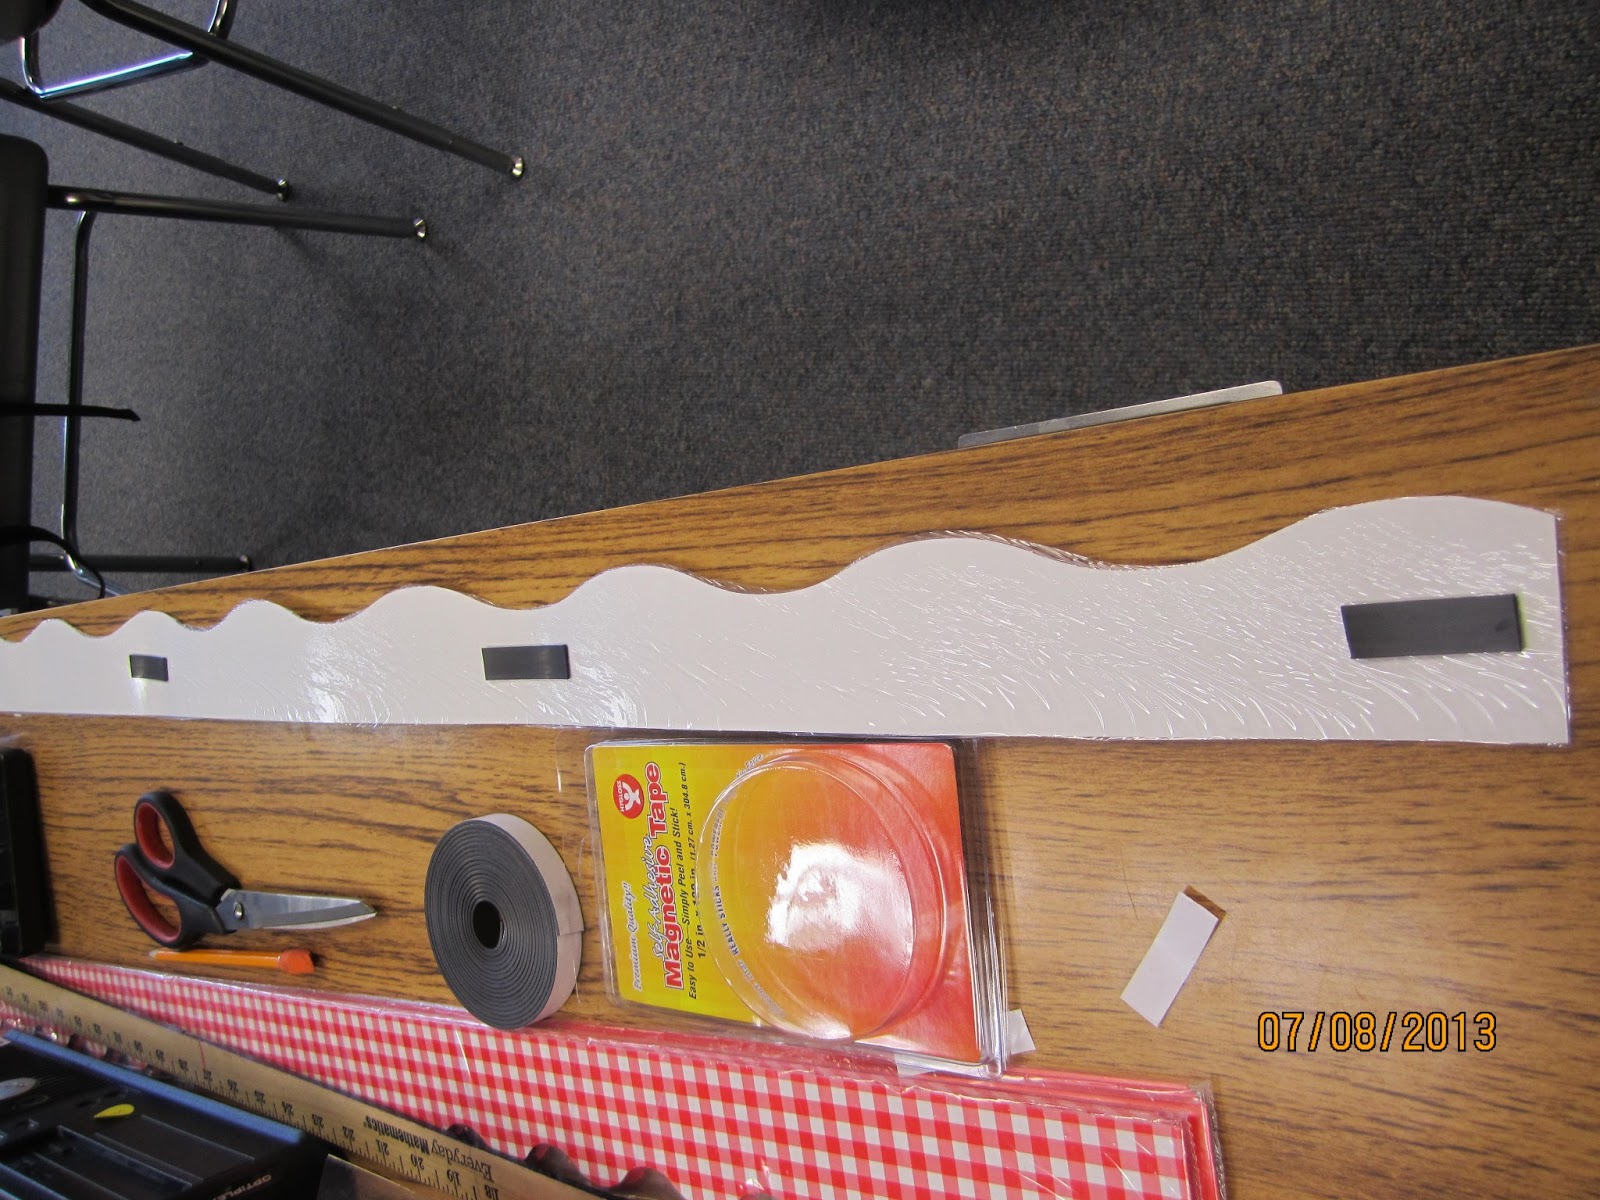
It was bulletin board prep, laminating, cutting and adding magnets!
 
They work great by the way!


Furniture was moved around a bit.  The tile part of the room still needed to be waxed, so nothing could be placed on that section, but that wasn't a concern.

This school year I will have a student in a wheelchair, he needs lots of space for equipment, a mat to provide physical therapy and wide pathways to navigate around, in and out of the room. He has limited vision and I want him to have easy access to the promethean board. There is so much to think about!

DAY 2

This was my last day to work in the classroom before  leaving, I  was hoping to get a lot done, however, the day was filled with omens that I really should have stayed home!

I got the "Book Nook" started, I want it to be open and accessible to a wheelchair. It will include a listening center.


There is still A LOT to do! I really wanted to move my desk back to it's spot, but the amazing desk mover wasn't available at the time.
Here's the bulletin board that will be above my desk..... I love the border, it's called deco dots.


Made a "To do" list for when we return........
 
 
I do like this board....this border has more colors then the "theme" allows, but I already had it and it goes with Clifford.

 
Well that's all that's ready, but it's a start!

The omens included the room being hot, stuffy and there was no breeze today and of course, I didn't bring a fan. I spilled my coffee on the newly waxed, shiny floor! I stubbed my toe so hard that I had to stop and administer first aide. I was barefooted to stay cooler. My stomach was a little wonky. I began to question the wisdom of leaving the house today!

However, it's all good! AND I will be heading to the flat lands of Oklahoma, family and friends very soon! Wooooo! 

I will post more articles from summer school in the next 2 weeks while I am visiting!

Enjoy the remainder of your summer,
Paula